ZBrush modeling

3D sculpt inspired by mixed martial arts.

Space Switching Video Series

A video series explaining the concept and scripting a tool to setup and interact with space switching setup for rigs.

Rigid Bodies Simulation

Small project with simulated rigid bodies and nParticle effects.

Maya Muscle Tutorial

A tutorial on using the spline deformer on custom geometry to create muscle flexing and stretching behavior.

Monday, November 19, 2012

Blend Shapes Video Tutorial

This was initially a research project, but I turned it into a quick 10min tutorial on how to use the blend shape deformer in Maya. Im posting this here as a first one. I want to make others to post in the near future. Model used in the lesson were borrowed for the demo.
Enjoy!

Wednesday, August 29, 2012

Character Design - Week IV - Final Week

So this is the last stage in production for this project. This is where we bring everything together. To finalize the model, I added geometry for the hair. I used different references to come with the look and and finally finished it with a different style of eye balls just for the final render, and gave the model eyebrows and eyelashes. I setup some lights for the renders and this is how it turned out.


Hope you've enjoyed it. I certainly did. A spoiler on whats to come. I've been learning hair systems. Expect to see some nice hair simulation soon. I'll be using this character model for the future projects. Also, this is what I plan to still do with to truly finalize production: texture and shade. The objective is to go for a more photoreal look. In the future I still wish to rig this model and build a facial rig for it to animate some expressions. So stay tuned, because there is a lot of cool stuff coming.

See you soon.

Tuesday, August 28, 2012

Character Design - Week III

And here we go again! This week the model is closer than ever to looking finished. There is, what I consider the most important feature, the detailed head. To finish off the head, I modeled the ear, and the foot which was the final body part. With all these modeled, I attached everything into a final model, and fixed any seams or geometry issues. With the model mirrored over and complete I did the UV for the model. Very busy week definitely, but the model speaks for itself.

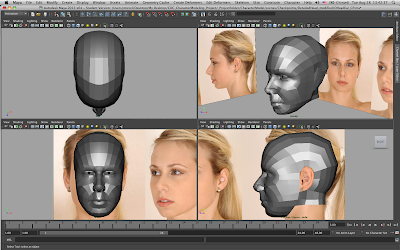
So first in line was the detailed head.


And here is a little video.


As soon as the more detailed head was done, I was ready to model the ear. I created a basic shape and then deformed it to match the model's ear shape. Here are some screenshots.


And as expected, a video as well.


Next we did the foot. Because the wasn't a really important part of the project, I approached it more freely. Especially because there wasn't very good reference available for the model's feet. However the foot topology still does justice to the human foot anatomy and shape. So lets get to it.


And a video.


Now that all the parts are modeled I can attach everything. I opted to go top to bottom. So first, I attached the ear. Then I build the geometry for the neck, I actually build it separately and then attached it as a bridge between the head and the torso. Then the arm to the torso, and the hand to the arm. Next was the leg to the torso, rerouting some geometry for the gluteus. And finally, the foot to the leg. So lets check it out.

Ear attachment:


Neck attachment:


Arms and Leg attachment:


And a quick vid


Hand attachment:


Foot attachment:


 And a final movie


With all parts attached the model is ready for UVs. Here are screenshots of the UVs.


So finally done with the modeling part lets move on to the character design sheet. This week I completely finished the character sheet. Added the swatches for materials, labels and titles, and close ups of props. Here is how it turned out.


And we bring week III to and end. Stay tuned for more.